Config AWS CodeBuild
Config AWS Code Build
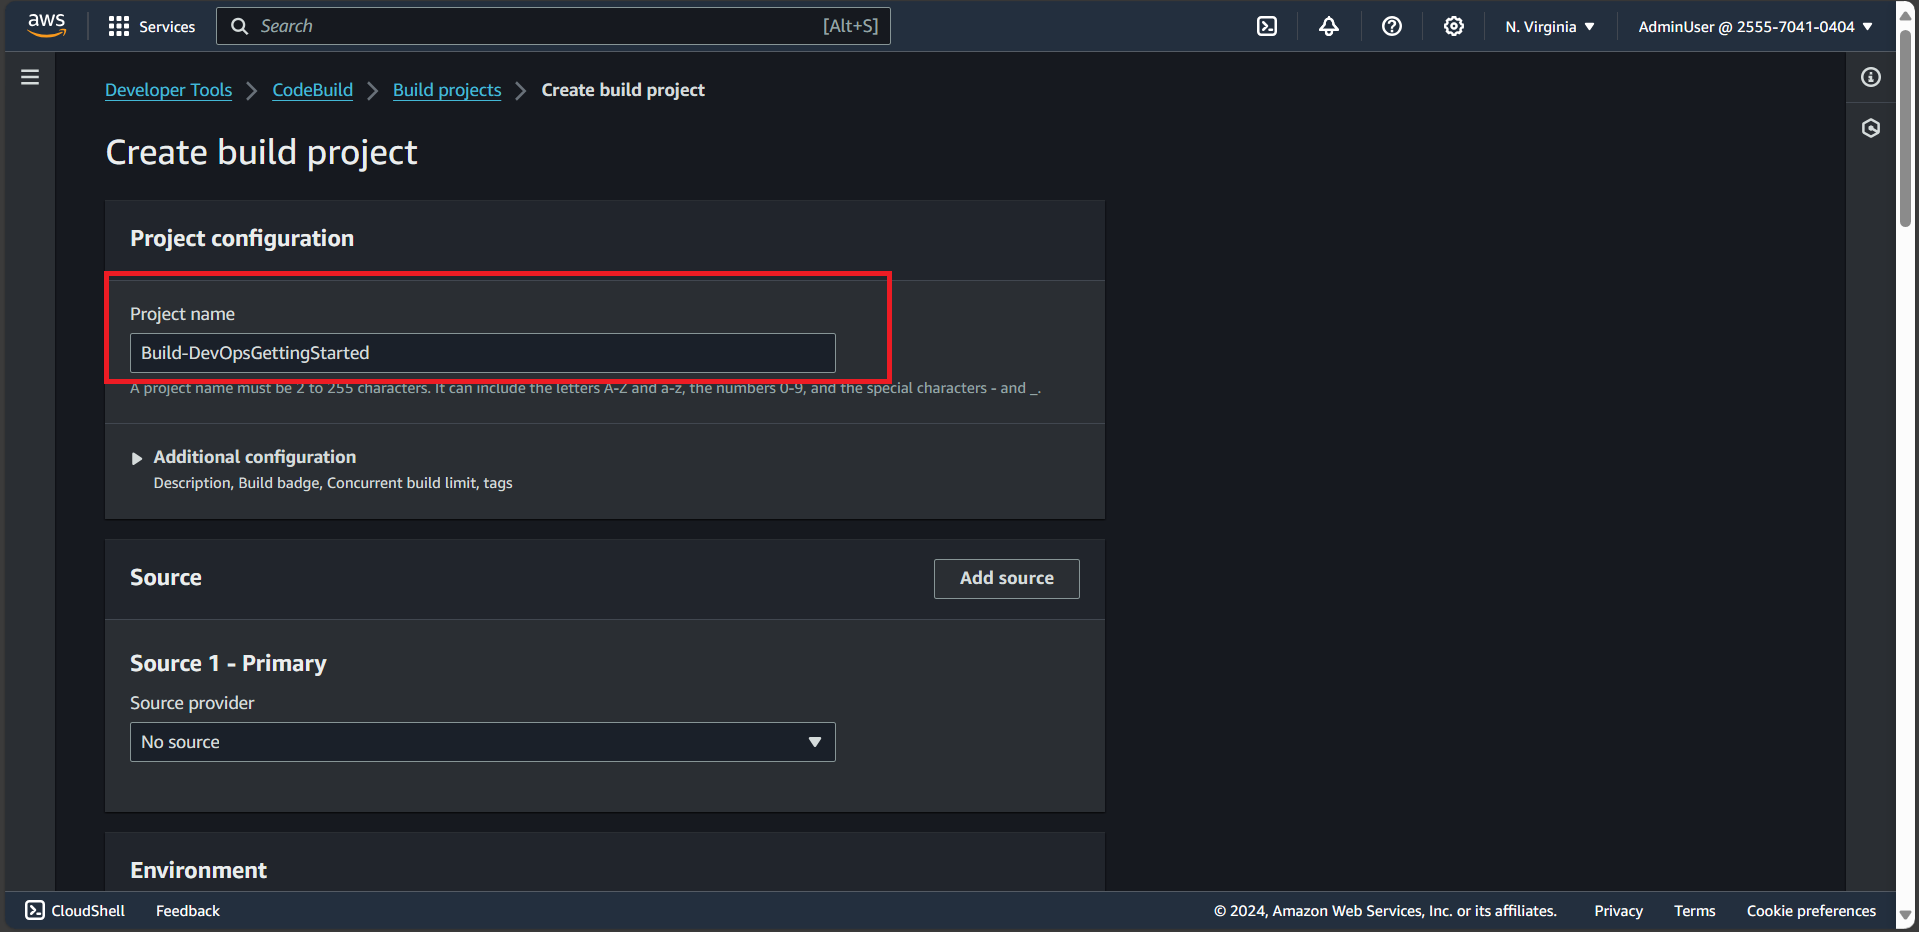
- In the Project name field, enter Build-DevOpsGettingStarted.

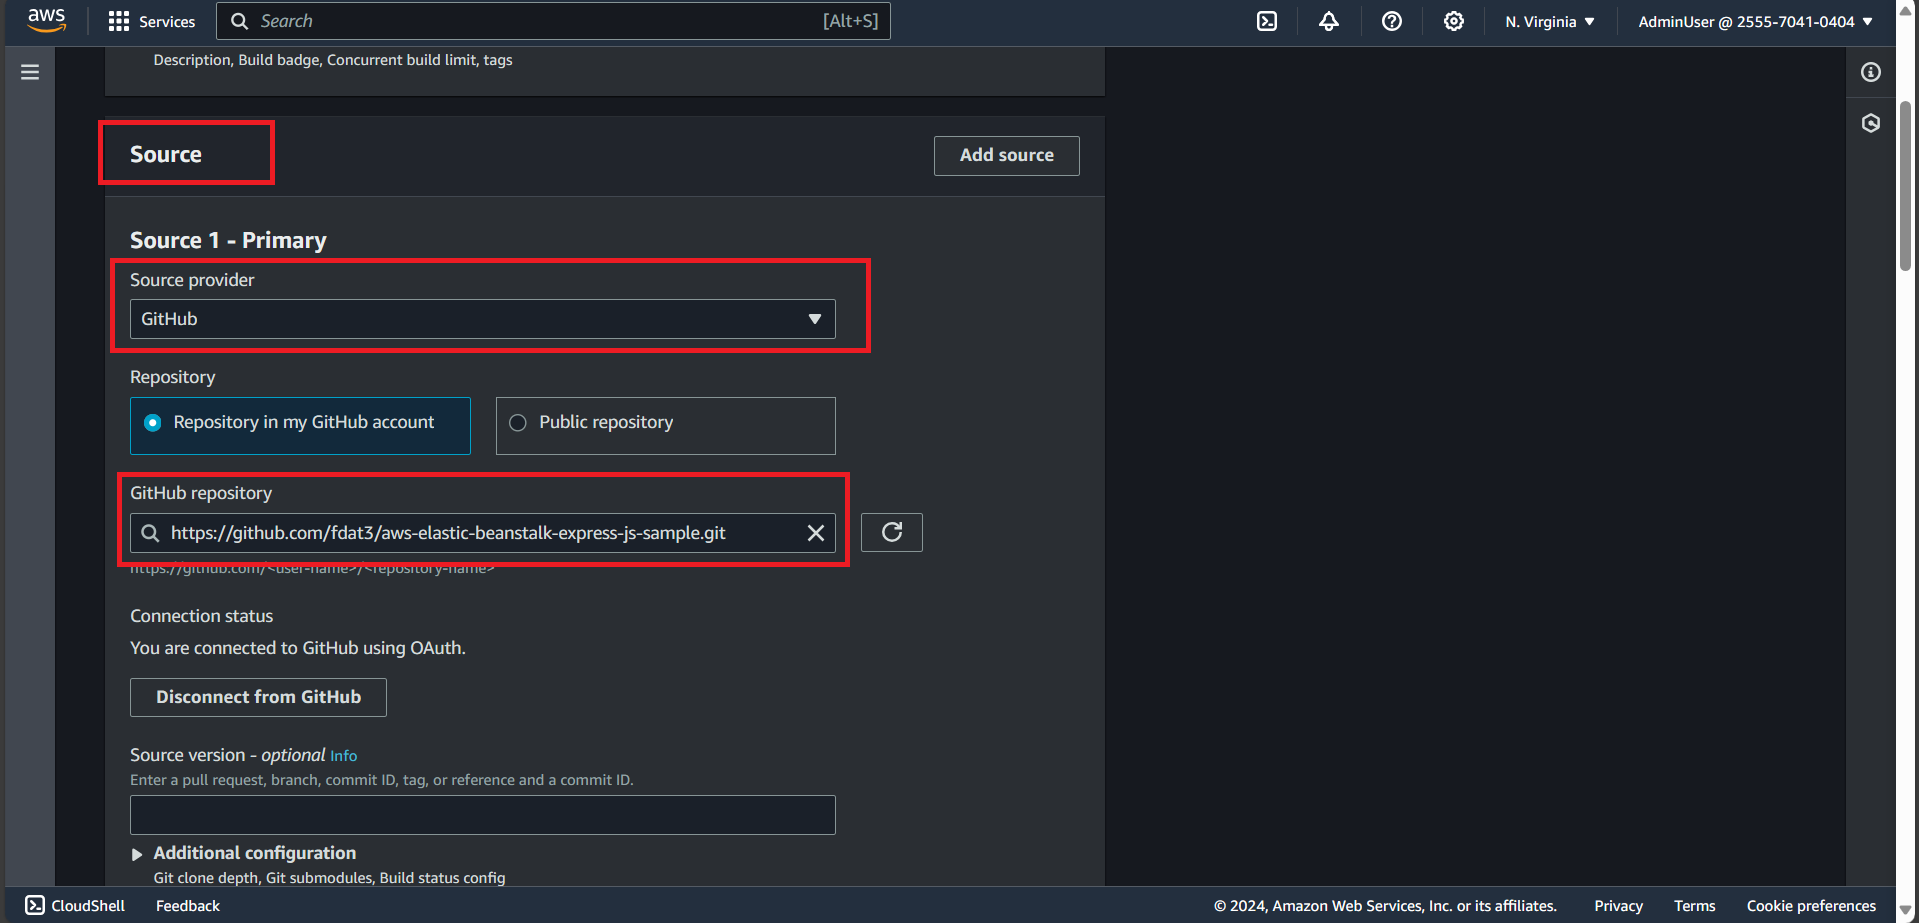
- Select GitHub from the Source provider dropdown menu.
- Confirm that the Connect using OAuth radio button is selected.
- Choose the white Connect to GitHub button. A new browser tab will open asking you to give AWS CodeBuild access to your GitHub repo.
- Choose the green Authorize aws-codesuite button.
- Enter your GitHub password.
- Choose the orange Confirm button.
- Select Repository in my GitHub account.
- Enter aws-elastic-beanstalk-express-js-sample in the search field.

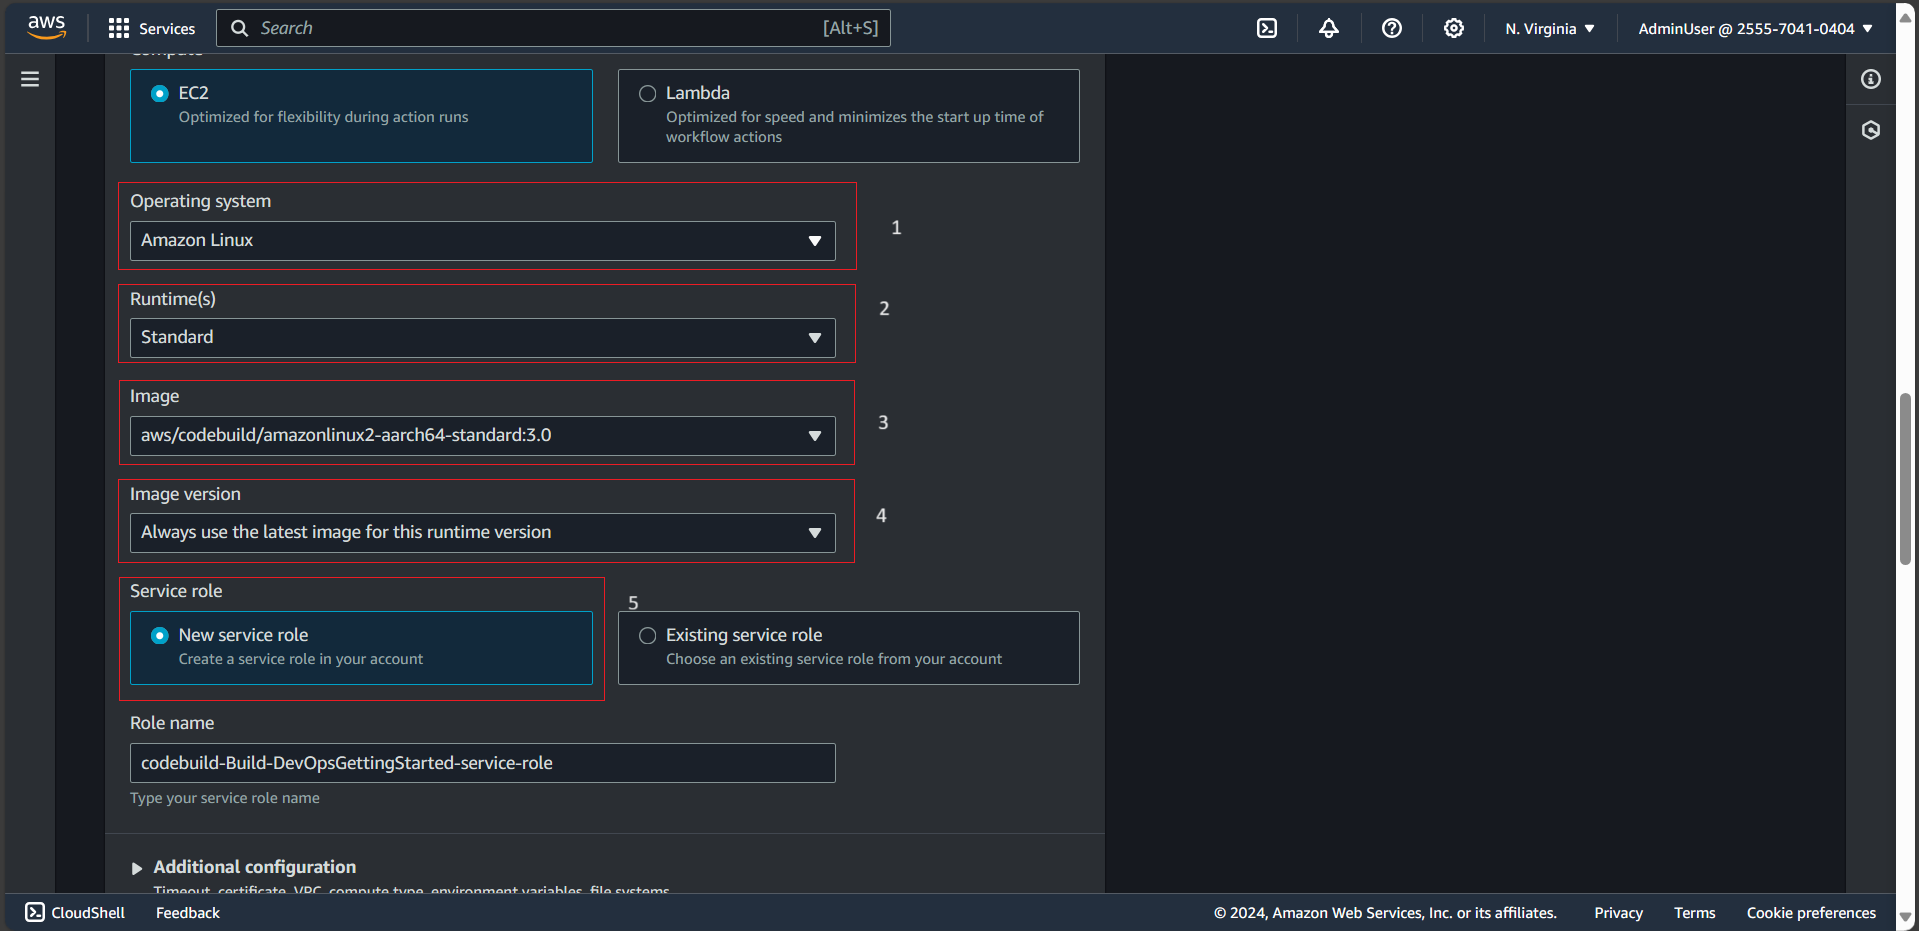
- Confirm that Managed Image is selected.
- Select Amazon Linux 2 from the Operating system dropdown menu.
- Select Standard from the Runtime(s) dropdown menu.
- Select aws/codebuild/amazonlinux2-x86_64-standard:3.0 from the Image dropdown menu.
- Confirm that Always use the latest image for this runtime version is selected for Image version.
- Confirm that New service role is selected.
