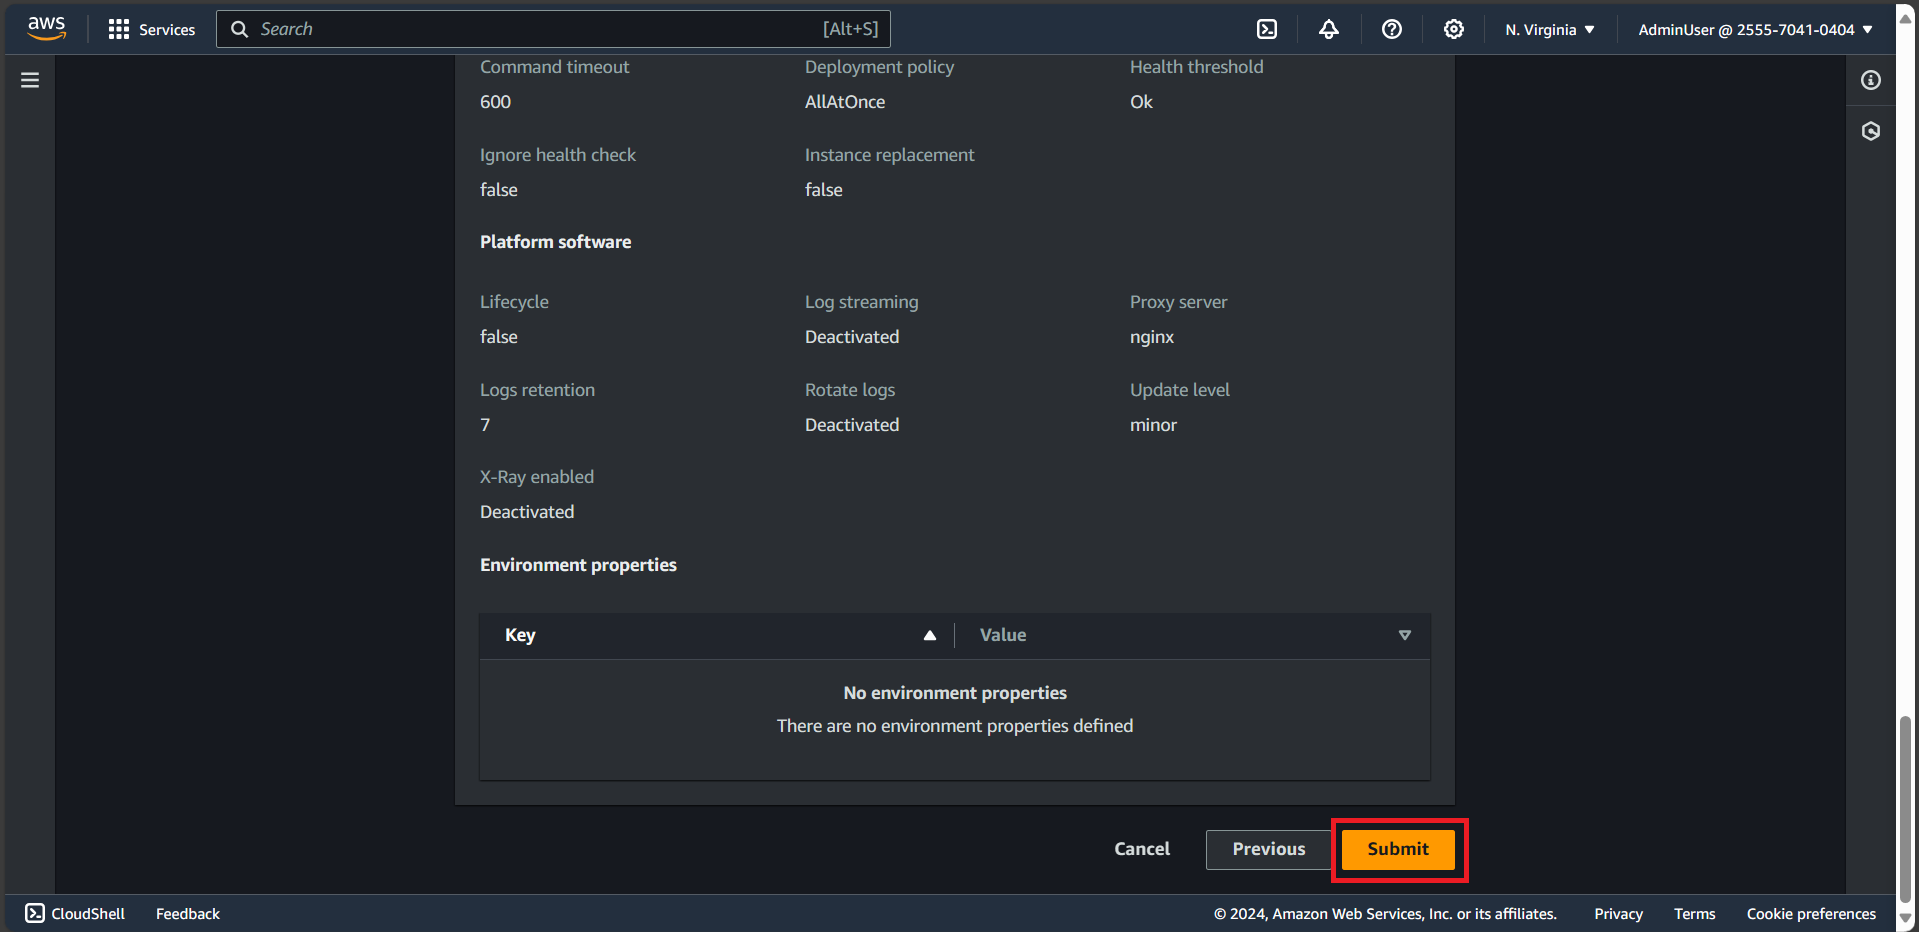
Create AWS Elastic Beanstalk
Create AWS Elastic Beanstalk
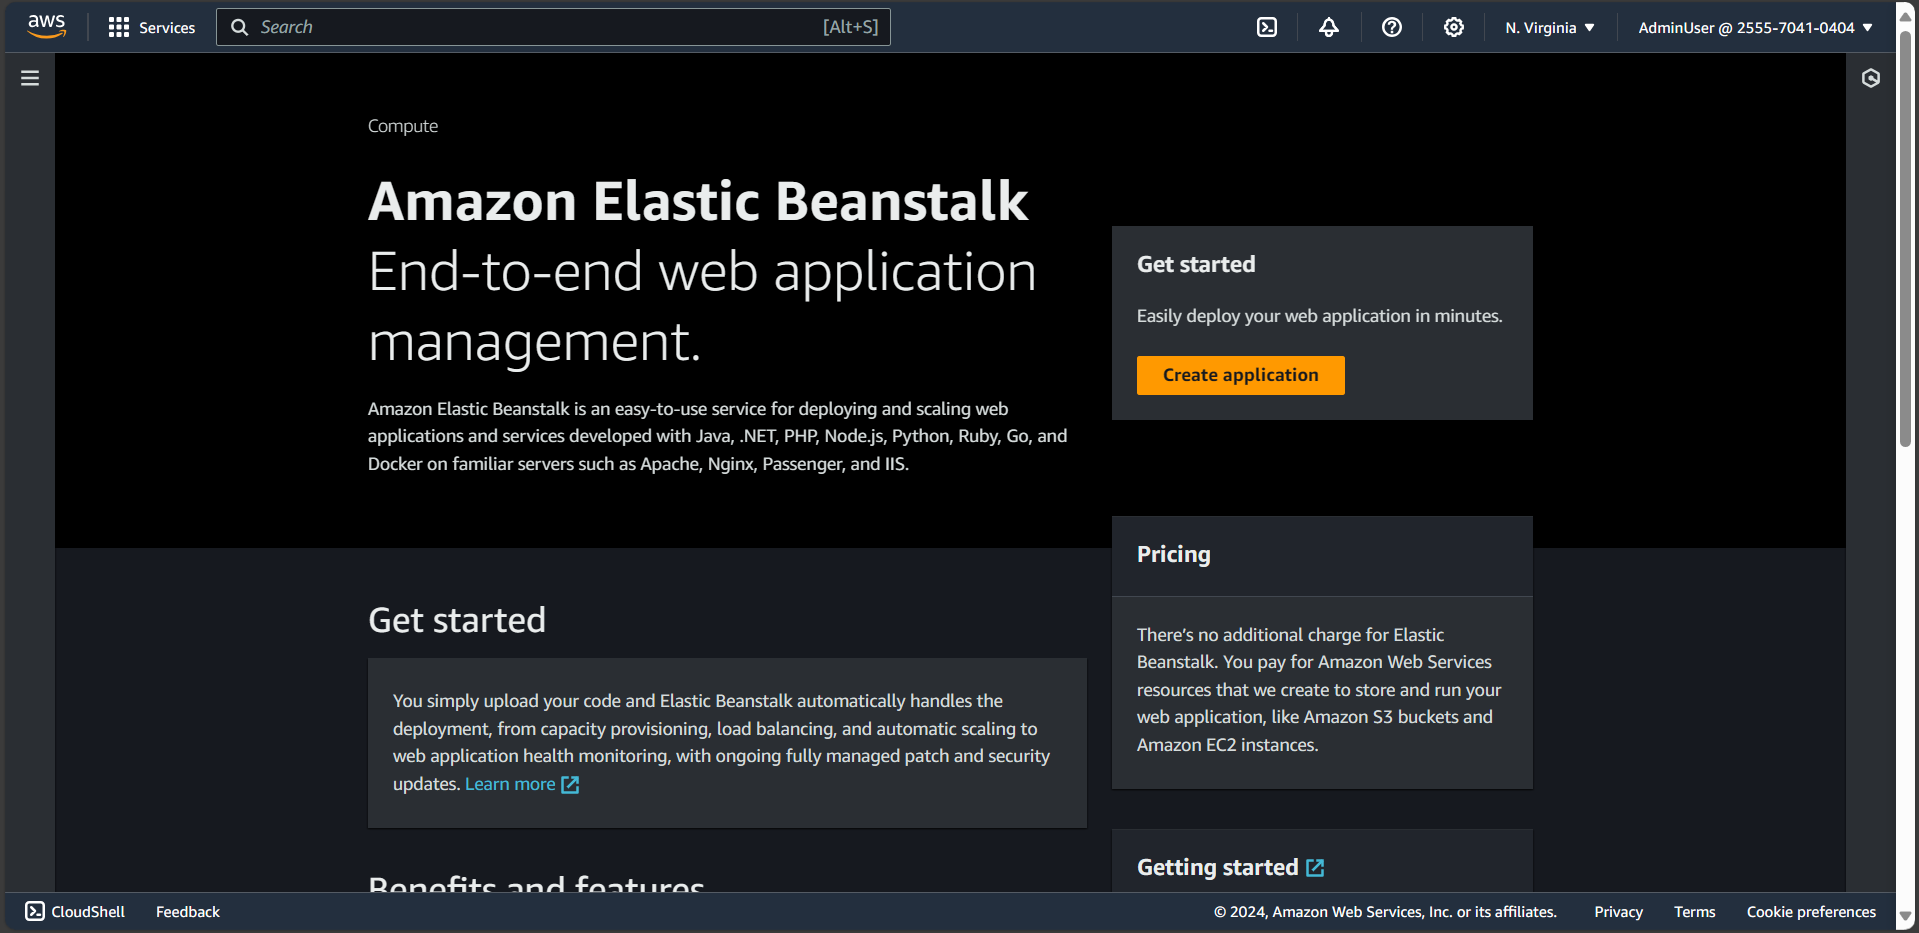
- In a new browser tab, open the AWS Elastic Beanstalk console.
- Click Create Application button
In Environment tier section
- Select Web Server Enviroment
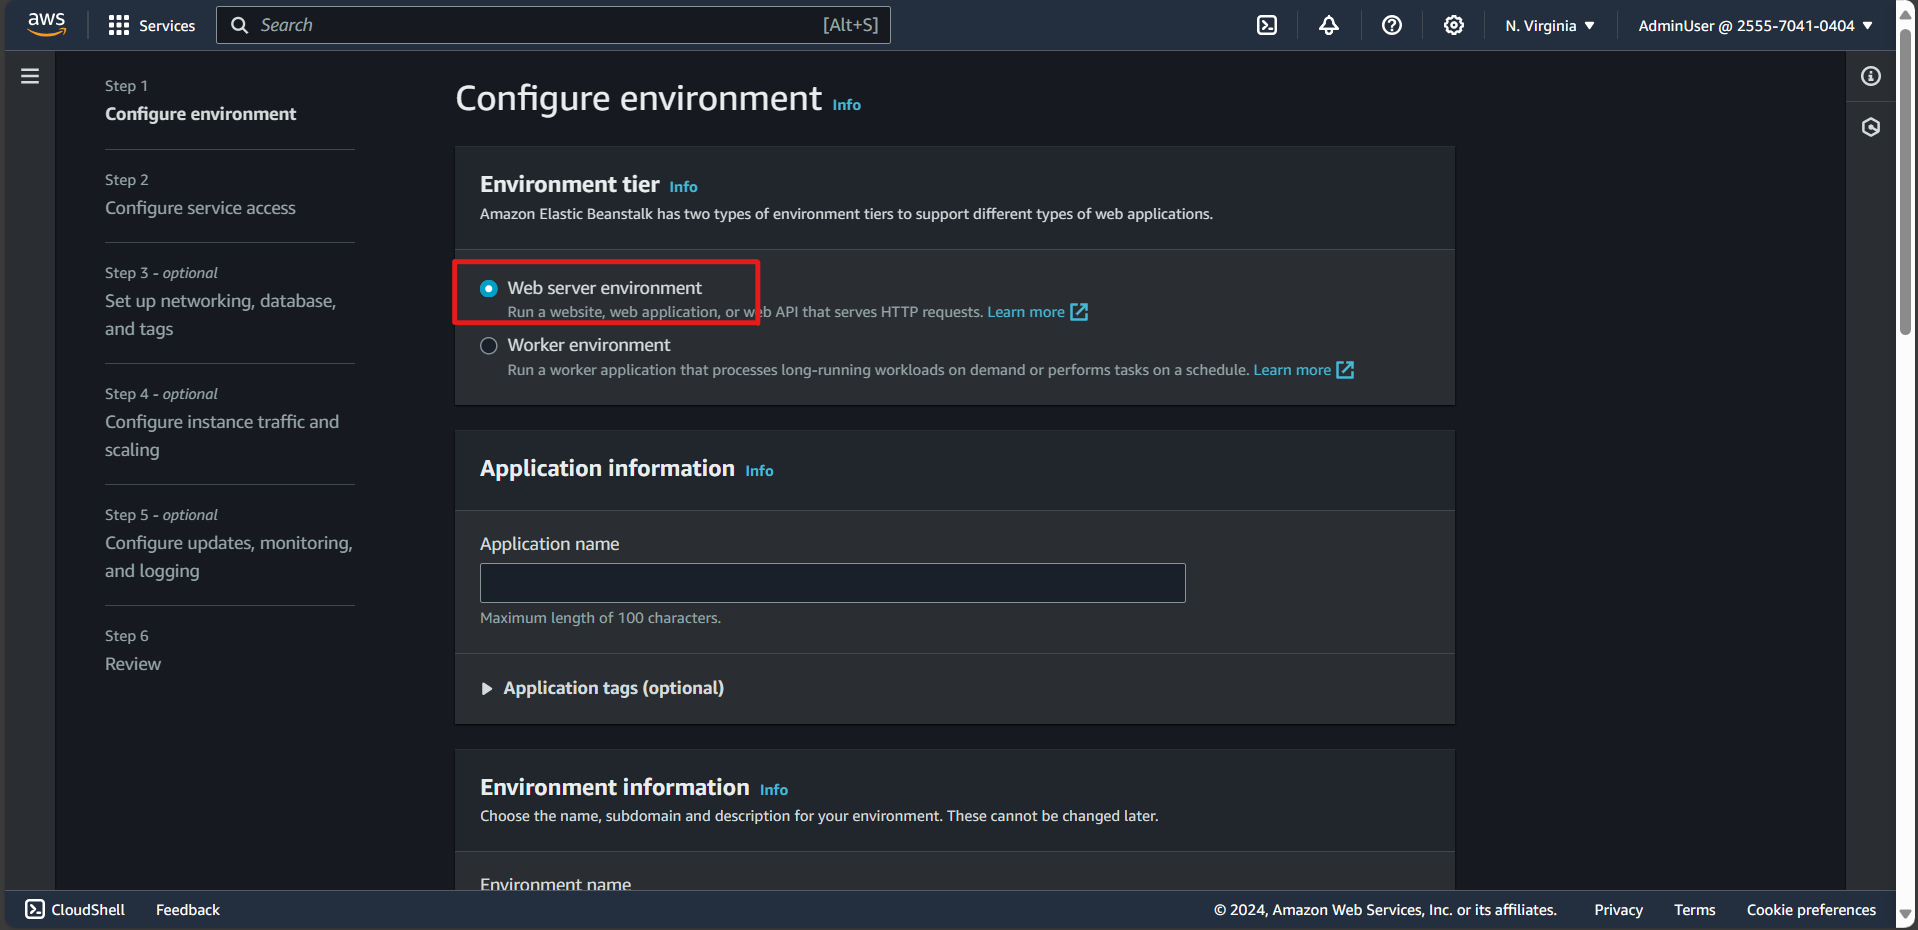
- Select Web Server Enviroment
In Application information
- Input your application name, enter DevOpsGettingStarted
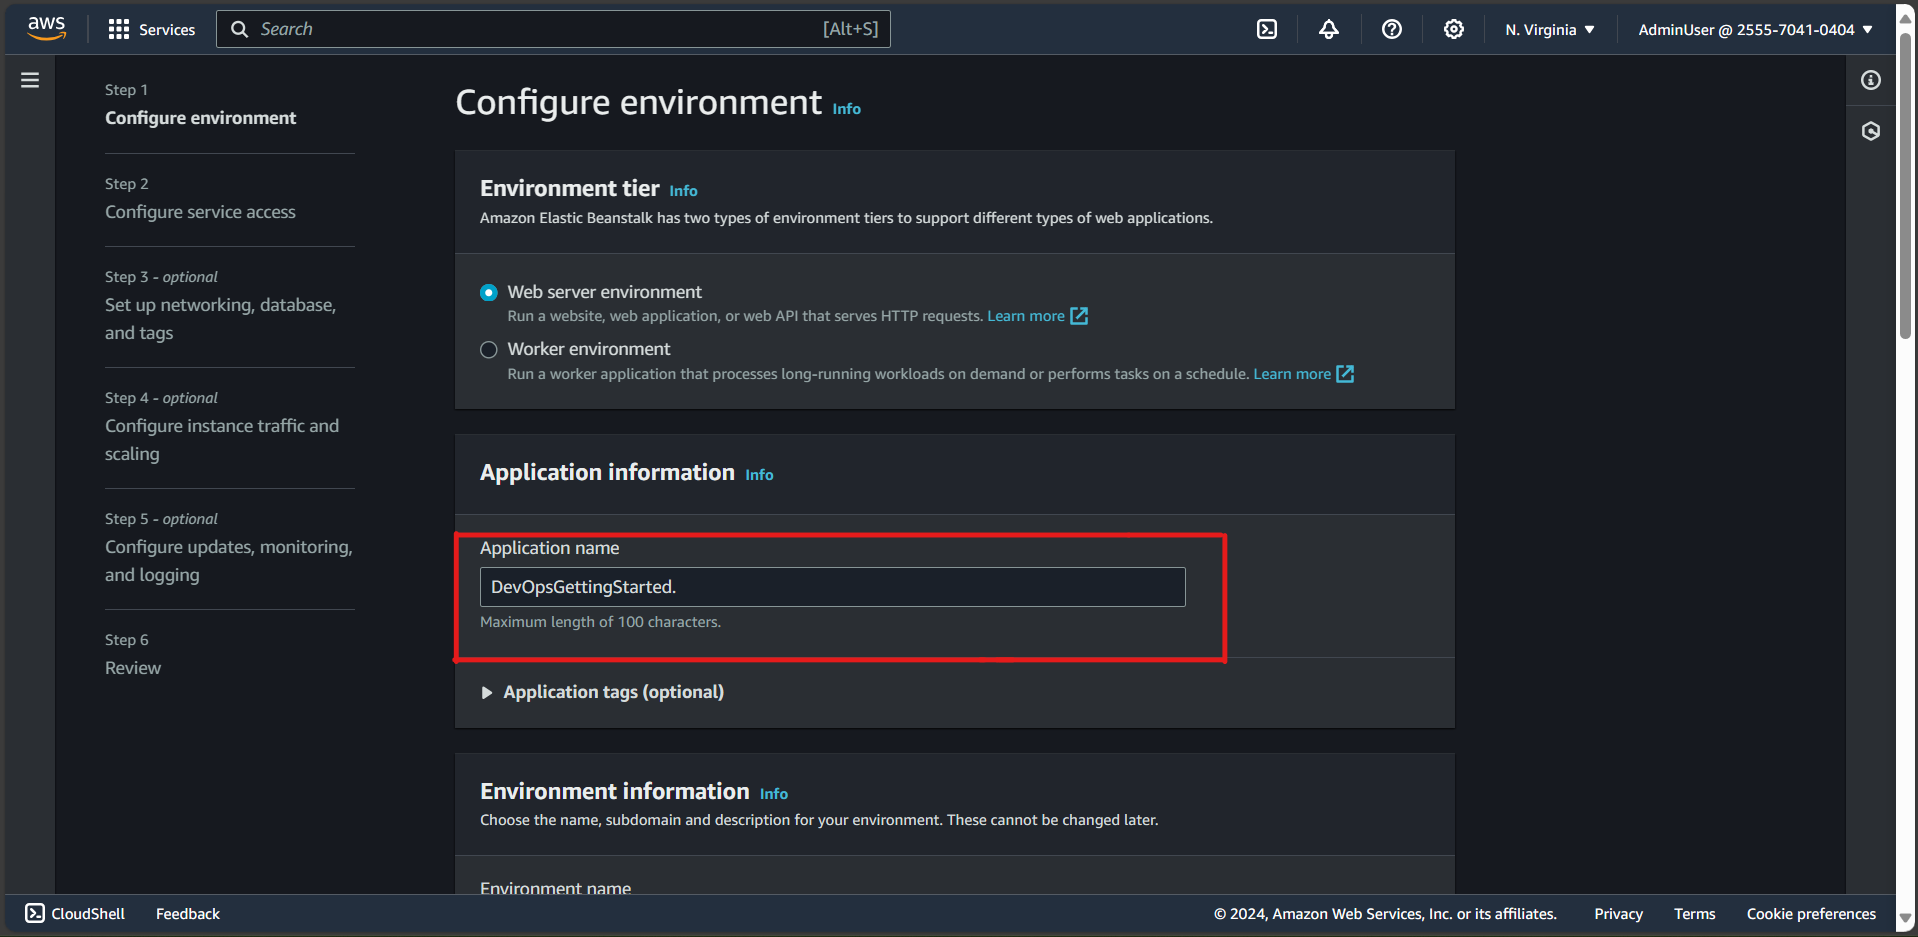
- Input your application name, enter DevOpsGettingStarted
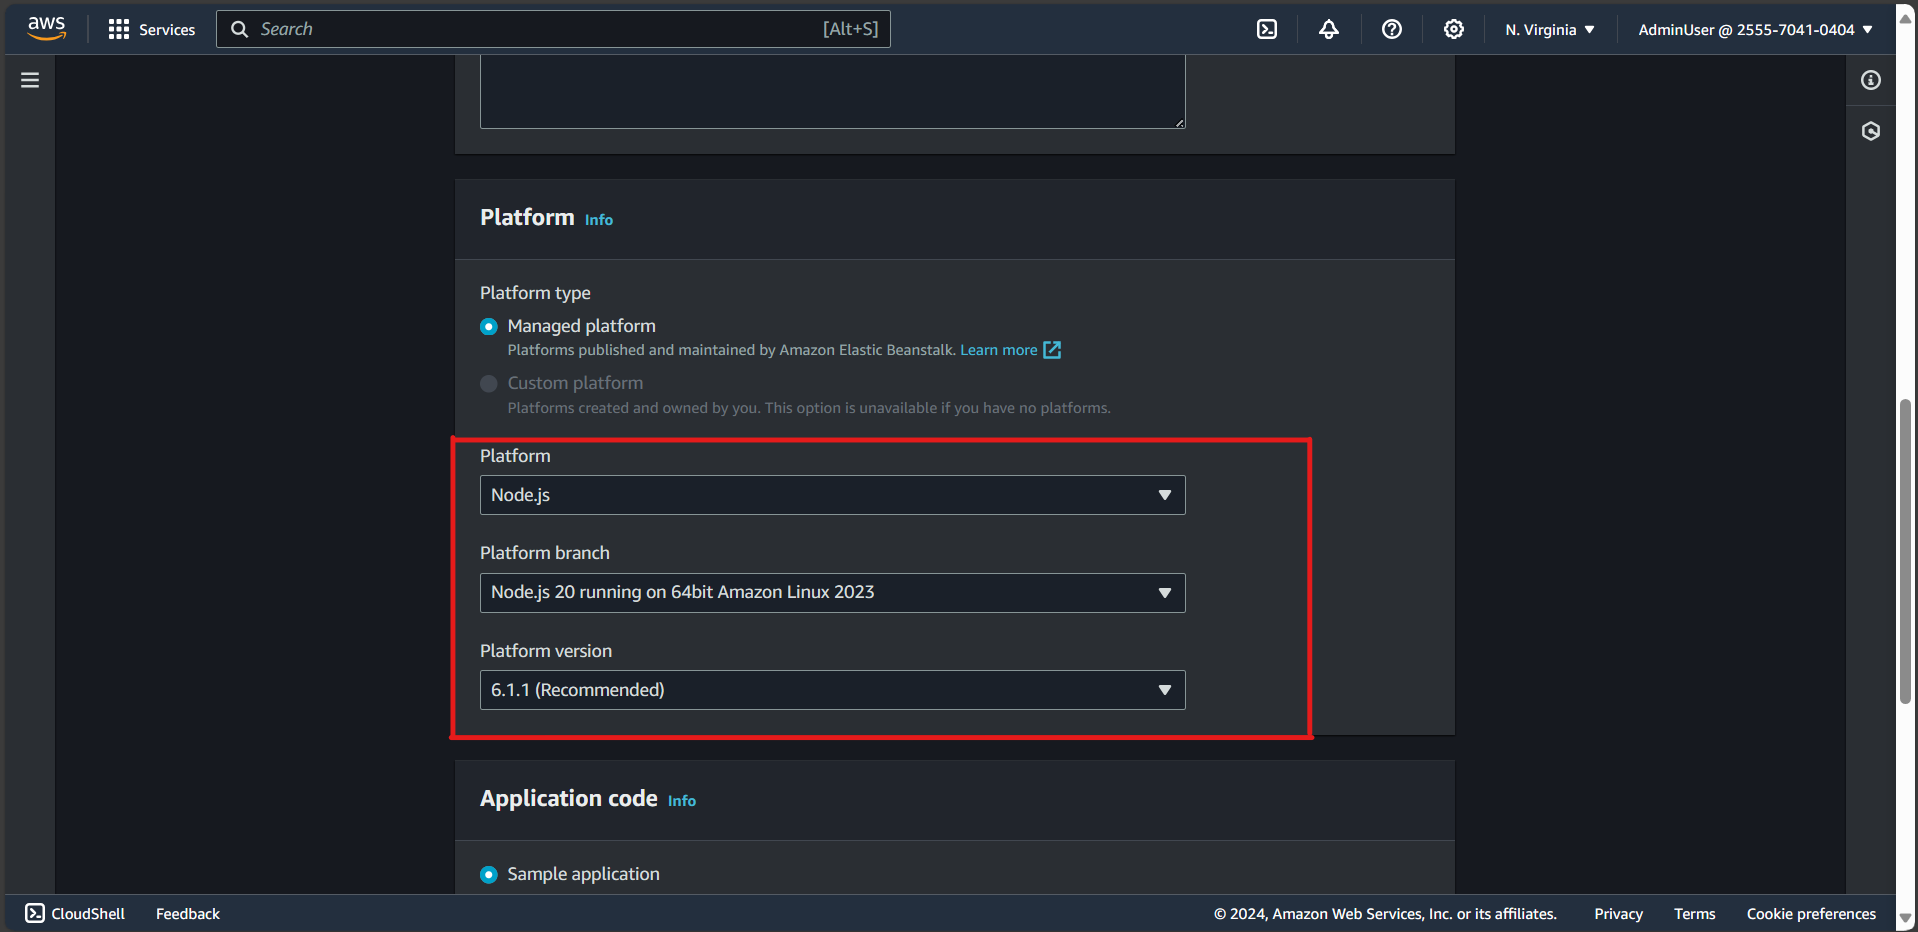
In Platform
- Choose Managed Platform
- Platform: Nodejs
- Platform branch: Node.js 20 running on 64bit Amazon Linux 2023
- Platform version: 6.1.1 (Recommended)
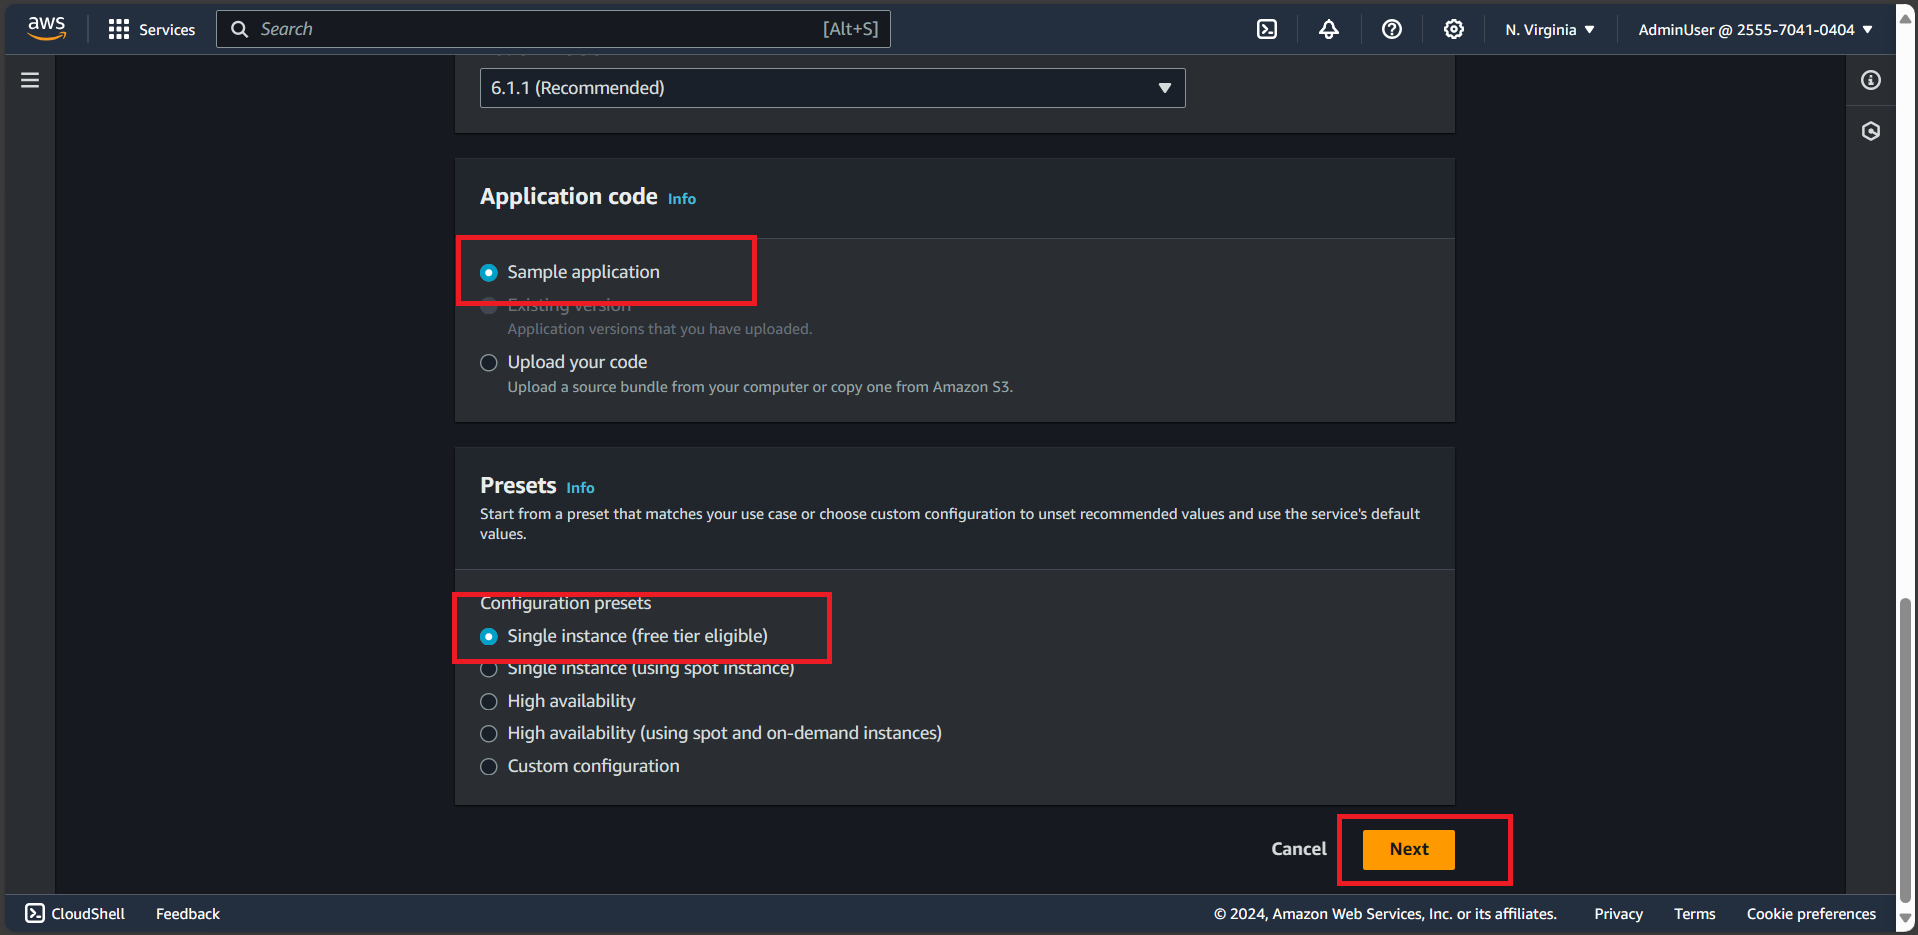
In Application Code:
- Choose Sample Application
- In Preset: Choose Single instance
- Click Next
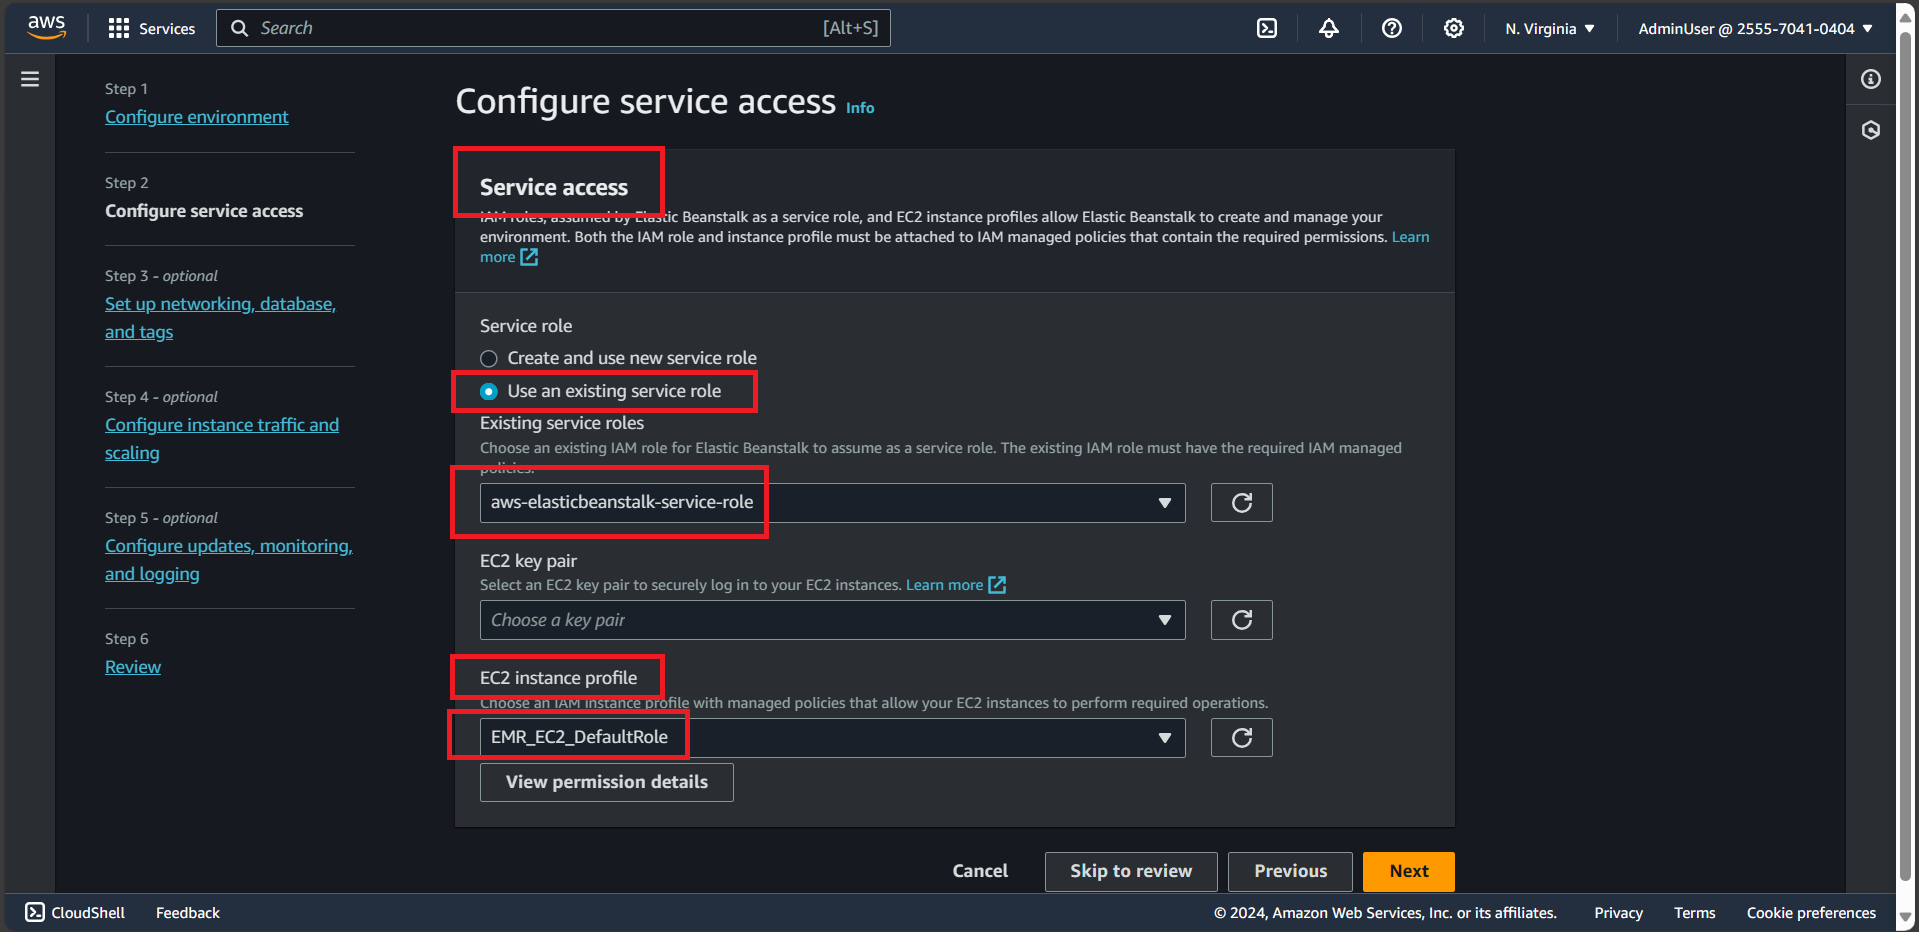
On the Configure service access screen, choose Use an existing service role for Service Role
Choose aws-elasticbeanstalk-ec2-role in the Existing service role
In EC2 instance profile:
- If aws-elasticbeanstalk-ec2-role displays in the dropdown list, select it from the EC2 instance profile dropdown list
- If another value displays in the list, and it’s the default EC2 instance profile intended for your environments, select it from the EC2 instance profile dropdown list.
- If the EC2 instance profile dropdown list doesn’t list any values to choose from, expand the procedure that follows, Create IAM Role for EC2 instance profile.
Choose Skip to Review on the Configure service access page
In Step 6: Review, click Submit
